Yamaha F115 Outboard Motors - Ownership Guide & Maintenance Checklist

Oil, Gear Lube & Interval Service Kits Designed Just for Your Yamaha F115

If you’re currently deciding what type of outboard motor you should invest in, you should know that the Yamaha F115 is one of the most popular outboards in the water today.

At Yamaha Online Parts, we’re proud to offer our customers a wide range of Yamaha F115 OEM parts and products. No matter which year F115 you have, we have the parts you need to keep it running and performing at the top of its game.

Of course, every outboard motor requires regular maintenance and knowledge about some challenges you’ll face as a proud Yamaha F115 owner. To help you keep your Yamaha F115 running great year after year, we’ve gathered important information on these amazing engines that every owner should know.

What Makes the Yamaha F115 a Great Choice for Boaters?

What Makes the Yamaha F115 a Great Choice for Boaters?

You’ll be in good hands with the Yamaha F115 outboard engine when you're seeking a reliable and proven inshore performer. Since originally put on the market in 1999, boaters have enjoyed the 1.8-liter displacement that results in outstanding volumetric efficiency. Plus, the Yamaha F115 has received several upgrades each year, improving the basic design with modern features such as the Helm Master navigation system

The Yamaha F115 offers incredible power for mid-size boats, including anglers looking to troll large, rough waters. It’s no wonder that the F115 has consistently won high marks for quality and value from J.D. Power and other industry analysts. Yamaha also understands that convenience is key, so this engine is compatible with the company’s award-winning Multi-Function Tiller Handle. This feature incorporates engine start/stop, emergency stop, gear shift, variable trolling switch, power trim, and tilt operation, warning, and controls. 

We know what you’re thinking. With all of this power, should you be worried about the weight of your Yamaha F115? Not in the slightest. The weight of this model is kept down thanks to the double overhead camshaft. This results in less mass in the cylinder head and overall reduced weight. Plus, the precision multi-point electronic fuel injection delivers the precise amount of fuel that’s needed for optimum performance efficiency.

Engine Specs for a 2021 Yamaha F115 Outboard Motor:

Engine Specs for a 2021 Yamaha F115 Outboard Motor:

  • Engine type: 4-stroke, Inline 4
  • Displacement: 1.8L (1832cc)
  • Bore x Stroke: 81mm x 88.9mm (3.19 in x 3.5 in)
  • Full throttle RPM range: 5,000-6,000 RPM
  • Horsepower: 115 HP @ 5,500 RPM
  • Induction system: DOHC Fuel Injection
  • Ignition system: TCI Microcomputer
  • Starting system: Electric
  • Lubrication system: Wet sump
  • Engine oil capacity: 4.5 L (4.8 US qt)
  • Recommended fuel: Unleaded gasoline (minimum pump octane rating of 87)
  • Exhaust system: Through propeller (with underwater exhaust)
  • Cooling system: Water-cooled with thermostat
  • Alternator output: 35 Amp
  • Gear ratio: 2.15:1 (Counter rotating models have a 2.27:1 gear ratio)
  • Propeller: Recommended range 13-21 inches (pitch)
  • Dry weight: 377 lbs (171 kg)
  • Recommended boat transom height: 25 inches (L) or 20 inches (X)

Note: These specifications are based on Yamaha's 2021 F115 outboard model and are subject to change with newer or older models.

Yamaha F115 Maintenance Guide

Yamaha F115 Maintenance Guide

Yamaha F115 is a high-performance outboard engine designed to provide reliable power for boaters. However, like any other mechanical device, it requires regular maintenance to keep it in top condition. Routine maintenance helps to prevent problems from occurring, which could otherwise lead to expensive repairs, downtime, and even safety issues.

One of the key benefits of regular maintenance for your Yamaha F115 is improved performance. Over time, engines can become dirty, worn, and inefficient, resulting in decreased power and fuel efficiency. Regular maintenance tasks such as oil changes, filter replacements, and spark plug replacements help to keep the engine running smoothly, resulting in optimal performance and fuel economy. Additionally, preventative maintenance allows for early detection of potential problems, allowing for prompt repairs before they worsen and lead to bigger issues.

Furthermore, regular maintenance can extend the lifespan of the engine. By keeping the engine clean, lubricated, and properly adjusted, you can avoid premature wear and tear and ensure the engine lasts many years. This can save you money in the long run, as you won't have to replace the engine prematurely. 

Overview of Maintenance Tasks

Before we delve into the nitty-gritty of what it takes to maintain your Yamaha 115, the following are the most common tasks you’ll need to perform:

  • Regular oil changes: Change the engine oil every 100 hours or at least once a year to keep the engine running smoothly and efficiently.
  • Fuel System Maintenance: Keep the fuel system clean by using ethanol-free fuel and a fuel stabilizer. Replace the fuel filters annually and inspect the fuel hoses for cracks or leaks.
  • Cooling System Maintenance: Keep the cooling system free of debris and regularly inspect the impeller and water pump. Replace the impeller every three years or as needed.
  • Power Trim and Tilt System Maintenance: Check the power trim and tilt system for leaks and inspect the fluid level. Refill the fluid as necessary and replace the seals every three years.
  • Engine Alignment: Check the engine alignment periodically to ensure it is properly aligned with the boat's propeller shaft. A misaligned engine can cause damage to the propeller and drive train.
  • Proper Storage: Store the engine in a dry, protected area when not in use to prevent damage from moisture and the elements.

These tasks and more are broken up into different phases known as “service intervals” based on the age and usage of the engine. These service intervals include:

  • Break-in Period
  • Regular Maintenance
  • First 20 Hours
  • Every 50 Hours
  • 100 Hours (or annually)
  • Winterization/Storage

Yamaha F115 Maintenance Checklist 

The following is a basic maintenance checklist for Yamaha F115 engines. Refer to the chart below to see what’s involved at each service interval. 

However, it’s important to note some differences between Yamaha F115 outboard engine models. To know exactly which Yamaha OEM parts and products you need, refer to your owner’s manual for a complete description of all required maintenance tasks.

Maintenance Action

20 Hours/3 Months

100 Hours/1 Year

300 Hours/3 Years

500 Hours/5 Years

Replace Gear Oil

Replace Engine Oil

Check/Replace wiring harness connections/lead coupler connections

Check and replace engine start switch/engine shut-off switch

Check and replace ignition coils/ignition coil leads

Check and replace propeller/propeller nut/cotter pin

Check and replace fuel line (low pressure)

Check and replace fuel line (high pressure)

Check and replace fuel filter (can be disassembled)

Check and replace cooling water leakage

Check, charge, and replace battery (electrolyte level, terminal)

Check, adjust, and replace throttle link/throttle cable

Check, adjust, and replace shift link/shift cable

Lubricate greasing points

Check Yamaha meter/gauge

Check water inlet

Check pilot water

Check PTT unit

Check fuel/oil leakage

Check engine idle speed/noise

Check engine starting condition noise

Check and replace timing belt

Check and replace thermostat

Check and replace spark plugs

Check and replace impeller/water pump housing

Replace engine oil filter

Check anodes (cylinder head exhaust passage)

Check anodes (external)

Check cowling lock lever

Check and replace fuel pump

Replace OVC filter

Replace anodes (cylinder head, cylinder block thermostat portion, oil cooler cover, exhaust guide

Check and adjust valve clearance

Finding Your Yamaha F115 Schematic

Finding Your Yamaha F115 Schematic

To ensure that you have a handy reference to keep up with your Yamaha outboard maintenance schedule, perform DIY repairs, AND order the exact parts you need for your Yamaha engine, you’ll need Yamaha F115 Schematics. Refer to this online Yamaha Engine Schematic database (powered by Snap-On Electronics Parts Catalog / Snap-On EPC) to help you find the correct parts number and order on Yamaha Online Parts

Once you’ve navigated to the database, you’ll only have to make a few clicks to match your particular model of outboard and needs:

  1. Start by clicking on the matching model number and horsepower of your engine (In this case, you’ll select “115hp”)
  2. The next screen will offer more specific models of 115 horsepower engines, such as:
    • VF115 SHO (4Cyl 1.8L)
    • F115 & LF115
    • 115 & S115 - 2 Stroke
    • B115 - 2 Stroke
    • P115 - 2 Stroke 
    • C115 - 2 Stroke
  3. Once you’ve matched your outboard’s model, you’ll be presented with several options for your specific engine model. Select your engine from the available options.
  4. In the next screen, you’ll be presented with a list of schematics labeled by the type of engine system or part. Click on the appropriate schematic.
    • Note: Due to the specificity of each schematic, you may need to click on several schematics until you’ve found the exact part. 
  5. Once you’ve selected the schematic, you’ll have a visual reference indicating all of the gauge’s parts and components with numbers corresponding to the part number.
    • Note: These schematics can be printed or emailed as a reference. 
  6. Click the matching part on the schematic OR click the corresponding number on the parts list (which will highlight the parts on the schematic for verification).
  7. Next to each list of each part is a shopping cart icon. Clicking the icon will add the part to a Shopping Cart list at the bottom of the screen (on desktop computers). Continue this process to populate the list with everything you need. 
  8. The Shopping List organizes each part by the following categories:
    • OEM
    • Model
    • Part Number
    • Qty (Quantity)
    • Description
    • Cover
    • Retail (Pricing)
  9. You'll find three icons on the left side of the list:
    • Clear Shopping Cart
    • Print Shopping Cart
    • Email Shopping Cart

Once you’ve printed or emailed your completed list of parts, enter the Part Number into Yamaha Online Parts’ Search box, add the matching item(s) to your shopping cart, and finalize your purchase.

Common Yamaha F115 4-Stroke Problems

Common Yamaha F115 4-Stroke Problems

As with any outboard motor, it's inevitable that issues may arise with the Yamaha 115 4-stroke outboard due to heavy usage and aging components. Although it offers exceptional performance, it's essential to perform regular maintenance and servicing to keep the motor running smoothly and avoid costly repairs that could take it out of commission. In short, routine maintenance is the key to keeping this high-performance outboard motor on the water and out of the repair shop.

Faulty Head Gasket

Malfunctioning Fuel Pump

Clogged Fuel Injectors

Clogged VST Filter

Faulty Trim and Tilt Switch

Faulty Head Gasket

A faulty head gasket is a common repair for Yamaha F115 outboard motors due to the high temperatures and pressures that the engine operates under. The head gasket serves as a seal between the engine block and cylinder head, designed to withstand these extreme conditions. However, over time, the gasket can deteriorate or fail for various reasons, such as overheating, improper maintenance, or old age.

When the head gasket fails, it can cause various problems, including loss of compression, overheating, oil leaks, and white smoke coming from the exhaust. These issues can significantly impact the engine's performance, and if left unaddressed, they can cause further damage to the engine components.

✅ Solution: Replacing a Yamaha F115 head gasket is a complex task that requires mechanical skills and knowledge. It's recommended to have a professional Yamaha outboard authorized service mechanic to perform the replacement to ensure the job is done correctly. Here's a general step-by-step guide on replacing a Yamaha F115 head gasket:

  1. First, ensure that the outboard motor is in neutral and the battery is disconnected to prevent accidental starts. Remove the cowling and disconnect any electrical connections to the engine.
  2. Drain the engine oil and coolant to prevent spills during the gasket replacement. Remove the propeller, drive shaft, and gearbox to access the cylinder head.
  3. Remove the cylinder head bolts in a crisscross pattern to prevent the warping of the head. Carefully remove the cylinder head from the engine block, taking care not to damage any gaskets or components.
  4. Remove the old head gasket from the cylinder head and engine block. Use a gasket scraper to remove any residue or debris from the mating surfaces. Ensure that the surfaces are clean and free of any nicks or scratches.
  5. Install a new head gasket on the cylinder head, taking care to align any holes or cutouts. Place the cylinder head onto the engine block and torque the head bolts in the correct pattern and specification provided by Yamaha.
  6. Reinstall the gearbox, drive shaft, and propeller. Refill the engine with new coolant and oil, ensuring you use the correct types and quantities Yamaha recommends.
  7. Reconnect any electrical connections and reinstall the cowling. Reconnect the battery and test the engine to ensure it's running smoothly and there are no leaks.

Again, it's highly recommended that a professional mechanic perform the head gasket replacement on a Yamaha F115 outboard motor. This guide is meant as a general overview and should not be used as a substitute for professional advice or instruction.

Malfunctioning Fuel Pump

A malfunctioning fuel pump on an F115 Yamaha outboard motor can cause a variety of performance problems. The fuel pump is responsible for delivering fuel from the gas tank to the engine, so if it is not working properly, the engine may not receive the fuel it needs to run. This can result in losing power, difficulty starting the motor, stalling, or rough running. 

A failing fuel pump can also cause the motor to run too lean or too rich, leading to additional problems like overheating, decreased fuel efficiency, or damage to the engine. 

✅ Solution: Here is a step-by-step guide to replacing the fuel pump on a Yamaha outboard motor:

  1. Locate the fuel pump: The fuel pump is usually on the side of the motor and can be identified by the fuel lines attached to it.
  2. Disconnect the fuel lines: To remove the fuel pump, you must disconnect the fuel lines attached to it. Be sure to place a container under the fuel lines to catch any fuel that spills out.
  3. Remove the fuel pump: Remove any bolts or screws that are holding the fuel pump in place, and then carefully pull the fuel pump away from the motor.
  4. Install the new fuel pump: Install the new fuel pump by reversing the steps you took to remove the old one. Ensure the new fuel pump is securely fastened in place and the fuel lines are properly connected.
  5. Test the motor: Start the motor and let it run for a few minutes to ensure that the new fuel pump is working properly and that the engine is running smoothly.

It's important to note that some Yamaha outboard motors have different fuel pump designs, and the process for replacing the fuel pump may vary depending on your specific model. 

It's also a good idea to inspect and replace the fuel filter when replacing the fuel pump, as a clogged fuel filter can cause the new fuel pump to fail prematurely. 

Clogged Fuel Injectors

Clogged fuel injectors are a common repair for Yamaha F115 outboard motors due to the harsh marine environment and the use of ethanol-blended fuels. Over time, fuel injectors can become clogged with dirt, debris, and varnish, negatively impacting the engine's performance. These deposits can cause the injectors to spray fuel unevenly or not at all, resulting in poor engine performance, reduced fuel efficiency, and increased emissions.

Moreover, using ethanol-blended fuels can contribute to the clogging of fuel injectors. Ethanol can absorb moisture from the air, which can lead to the formation of deposits and corrosion in the fuel system. These deposits can clog fuel injectors, fuel lines, and other components, leading to engine problems. Regular maintenance, including fuel system cleaning, can help prevent clogged fuel injectors and ensure the engine runs smoothly and efficiently.

✅ Solution: The following is a step-by-step process for cleaning your Yamaha F115 fuel injectors:

  1. Locate the fuel injectors: The fuel injectors are usually located near the top of the engine block and will have a small fuel line running to each one.
  2. Remove the fuel injectors: Use a socket wrench to carefully remove the bolts holding each fuel injector. Be sure to keep track of the bolts and any other small parts that come with them.
  3. Inspect the fuel injectors: Check each fuel injector for any visible signs of damage, such as cracks or leaks. Also, inspect the spray tip for signs of blockage, such as dirt or debris.
  4. Soak the fuel injectors: To clean the fuel injectors, you will need to soak them in a cleaning solution. Use a container that is large enough to hold all the injectors and fill it with the cleaning solution. Place the fuel injectors in the solution and let them soak for the recommended time, usually around 30 minutes.
  5. Rinse the fuel injectors: After soaking the fuel injectors, rinse them thoroughly with clean water. This will help to remove any remaining dirt or debris.
  6. Reinstall the fuel injectors: Carefully reinstall the fuel injectors, making sure to tighten the bolts securely. Be sure to reattach any fuel lines or other components that were removed.
  7. Test the motor: Once the fuel injectors are reinstalled, start the motor and let it run for a few minutes. This will help ensure that the fuel injectors are working properly and the motor is running smoothly.

Clogged VST Filter

The VST filter on a Yamaha F115 outboard motor, is an important component in the fuel delivery system. VST stands for "vapor separator tank," a fuel reservoir that stores and pressurizes fuel for delivery to the engine's fuel injectors.

The VST filter is a small, pleated filter inside the VST assembly. It is designed to capture and remove any dirt, debris, or contaminants in the fuel before it is delivered to the engine. The VST filter works with the primary fuel filter and helps prevent the fuel injectors from becoming clogged or damaged, which can cause a loss of power, poor engine performance, and even engine damage.

Over time, the VST filter can become clogged with debris and contaminants, which can restrict the flow of fuel to the engine. To maintain proper engine performance, replacing the VST filter at the recommended intervals specified by Yamaha is important. Generally, Yamaha recommends replacing the VST filter every 3 years or 300 hours of use, whichever comes first. It is also important to follow Yamaha's recommended maintenance procedures and use only genuine Yamaha parts to ensure proper operation and longevity of the engine.

✅ Solution: Here are the steps to unclog your VST filter:

  1. Locate the VST assembly: The VST assembly is typically located on the starboard (right) side of the engine, near the fuel pump.
  2. Remove the VST assembly: To access the VST filter, you must remove the VST assembly. This will require disconnecting the fuel lines and electrical connections from the assembly and removing any bolts or screws that hold it in place. Consult your Yamaha owner's manual for specific instructions on removing the VST assembly on your particular model.
  3. Inspect the VST filter: Once you have removed the VST assembly, inspect the VST filter for any visible signs of blockage, such as dirt or debris. If the filter appears to be clogged, it will need to be cleaned or replaced.
  4. Clean or replace the VST filter: If the VST filter is dirty, you can attempt to clean it by carefully spraying it with a non-flammable, non-toxic solvent or cleaning solution. Be sure to follow the manufacturer's instructions and take care not to damage the filter element. If the filter is too clogged to clean or is damaged, it will need to be replaced with a new filter element.
  5. Reinstall the VST assembly: Once you have cleaned or replaced the VST filter, carefully reinstall the VST assembly, making sure to reconnect any disconnected fuel lines or electrical connections.
  6. Test the motor: Start the motor and let it run for a few minutes to ensure that the VST filter is working properly and that the engine is running smoothly.

It's important to note that if the VST filter becomes clogged frequently, it may be a sign of a larger issue with the fuel delivery system, such as a problem with the primary fuel filter or fuel lines. In this case, it's best to consult a qualified Yamaha service technician for further diagnosis and repair.

Faulty Trim and Tilt Switch

The trim and tilt switch on your Yamaha outboard motor is responsible for controlling the position of the motor's propeller in the water. When the switch is working correctly, you can adjust the trim and tilt of the motor to optimize the boat's performance and handling in different water conditions.

If the Yamaha trim and tilt switch is faulty or not working properly, it can affect the performance of your outboard motor in a number of ways. Here are some potential issues that can arise:

  1. Difficulty trimming or tilting the motor: If the trim and tilt switch is not functioning properly, it can be difficult or impossible to adjust the position of the motor's propeller in the water. This can make it harder to steer the boat and affect its overall performance in different water conditions.
  2. Overheating: A malfunctioning trim and tilt switch can cause the motor to tilt too far out of the water, leading to engine overheating. Overheating can cause serious damage to the motor and can even result in complete engine failure.
  3. Loss of power: If the motor is not properly trimmed and tilted, it may not be able to operate at peak performance. This can result in a loss of power, slower acceleration, and reduced top speed.
  4. Poor fuel efficiency: When the motor is not trimmed and tilted properly, it can use more fuel than necessary, leading to poor fuel efficiency and increased operating costs.
  5. Increased wear and tear: A faulty trim and tilt switch can stress the motor's mechanical components more, leading to increased wear and tear and the need for more frequent repairs.

✅ Solution: Swapping out the trim and tilt switch is a relatively simple repair. However, a faulty trim and tilt switch can indicate other issues, including an electrical short, low battery, and mechanical issues related to your hydraulic systems.

Learn More with Yamaha Online Parts

Yamaha F115 FAQ

How often to change the oil in Yamaha 4 Stroke outboard?

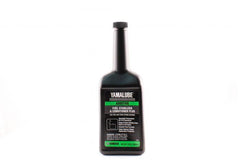
The frequency of oil changes in a Yamaha 4-stroke outboard engine depends on several factors, including the model year of the engine, the hours of use, the operating conditions, and the type of oil used. As a general guideline, Yamaha recommends changing the oil and oil filter every 100 hours of operation or at least once a year, whichever comes first.

However, suppose the outboard is used in heavy-duty conditions such as high-speed running, trolling for extended periods, or operating in dirty or dusty environments. In that case, more frequent oil changes may be necessary. In these cases, it is recommended to check the oil level and condition regularly and change the oil and filter more frequently if necessary.

It is important to use the recommended type and weight of oil for the specific Yamaha outboard model. This information can be found in the owner's manual or Yamaha's website. Using the correct oil type and changing it according to the recommended schedule will help ensure the outboard engine's longevity and reliability.

What's the recommended annual maintenance for a gas-powered boat? 

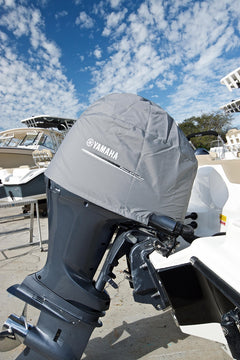
Recommended yearly maintenance for a gas-powered boat typically includes several important tasks to keep the boat running smoothly and safely. Some of the most important maintenance tasks include changing the engine oil and filter, replacing the fuel filter, checking the battery, and inspecting the propeller for damage. It is also recommended to inspect the boat's fuel system, including the fuel tank and fuel lines, is also recommended for any signs of wear or damage.

Other important maintenance tasks may include lubricating moving parts, inspecting the steering and throttle systems, and checking the boat's electrical system for any loose or damaged wiring. By performing these annual maintenance tasks, boat owners can help ensure their vessel's safety and reliability and enjoy many years of trouble-free boating.

How many hours does a 2 stroke outboard last? Do they last longer than a 4 stroke outboard?

The lifespan of a 2-stroke outboard engine can vary depending on several factors, such as the model, maintenance, and usage conditions. Generally, if a 2-stroke outboard is properly maintained and serviced regularly, it can last for many years and hundreds, if not thousands, of operating hours. However, 2-stroke engines tend to have a shorter lifespan than 4-stroke engines due to how they operate.

The lifespan of a 4-stroke outboard engine can also vary depending on several factors, such as the model, maintenance, and usage conditions. 4-stroke engines tend to be more durable than 2-stroke engines due to their design, which operates with fewer moving parts and lower operating speeds, reducing wear and tear.

However, the lifespan of both 2-stroke and 4-stroke outboard engines will depend on many factors, and it's challenging to provide a specific number of hours or years that an engine will last.

Ultimately, the lifespan of an outboard motor will depend on factors such as usage, operating conditions, and regular maintenance. Regular maintenance and proper usage, such as not over-revving the engine, will help ensure an outboard engine's longevity and reliability.

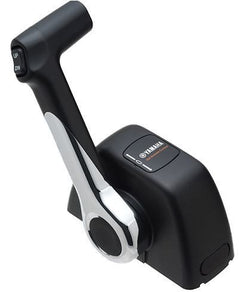
Should I use OEM Yamaha F115 parts or aftermarket parts?

Both OEM (original equipment manufacturer) Yamaha F115 parts and aftermarket F115 parts can be used to repair or maintain your Yamaha outboard motor. However, there are some factors to consider when deciding which parts to use.

OEM Yamaha parts are designed specifically for your outboard model and have been tested to meet the same quality standards as the original parts that came with your outboard. OEM parts are generally more expensive than aftermarket parts, but they provide a greater level of reliability and consistency, and they may come with a warranty or guarantee from the manufacturer.

On the other hand, aftermarket parts are often less expensive than OEM parts, and there are often many options to choose from. While some aftermarket parts may be of equal or better quality than OEM parts, others may not meet the same standards, which could affect the performance or lifespan of your outboard.

Ultimately, deciding whether to use OEM or aftermarket F115 parts depends on your budget, personal preference, and the specific parts needed. It's important to do your research and select reputable suppliers when considering aftermarket parts and to always follow the manufacturer's guidelines for repairs and maintenance to ensure the safety and reliability of your Yamaha outboard motor.

Does the MYYAMAHAOUTBOARD app help me keep track of how many hours on a boat engine I have?

Yes, the MyYamahaOutboard app can help you track how many hours your boat engine has been used. The app provides real-time information about the engine's usage, including its running hours. This information can be helpful for keeping track of maintenance schedules and ensuring that the engine is serviced at the appropriate intervals.

To access this information, connect the app to your Yamaha outboard motor using a compatible interface cable. Once connected, the app will display a range of data, including engine hours, fuel consumption, and battery voltage. You can also set alerts to remind you when it's time for scheduled maintenance.